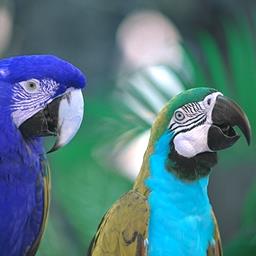
今回はC++ AMPを利用して画像処理を行ってみたいと思います。
下図のように、赤と青を入れ替える処理を実装していきます。
 |
 |
アプリケーションコード
concurrency::arrayを利用するとint配列しか受け付けてくれないため、今回はconcurrency::graphics::textureを利用しています。
BMPの読み書きは下記記事のものを利用しています。
Bitmap読み書き - 何でもプログラミング
#include <amp.h>
#include <amp_graphics.h>

int main()
{
    int width, height;
    std::vector<byte> srcPixels;
    LoadBitmap24("Parrots.bmp", &width, &height, &srcPixels);

    // bits_per_scalar_elementに8Uを指定した場合、texture_view<const int>経由でアクセスしないとエラーになります。
    concurrency::graphics::texture<int, 2> srcTexture(height, 3 * width, srcPixels.data(), srcPixels.size(), 8U);
    concurrency::graphics::texture_view<const int, 2> srcView(srcTexture);

    concurrency::graphics::texture<int, 2> dstTexture(height, 3 * width, 8U);

    concurrency::extent<2> extent(height, width);
    concurrency::parallel_for_each(extent, [&, srcView](concurrency::index<2> idx) restrict(amp) {
        concurrency::index<2> idx1(idx[0], 3 * idx[1]);
        concurrency::index<2> idx2(idx[0], 3 * idx[1] + 1);
        concurrency::index<2> idx3(idx[0], 3 * idx[1] + 2);
        dstTexture.set(idx1, srcView[idx3]);
        dstTexture.set(idx2, srcView[idx2]);
        dstTexture.set(idx3, srcView[idx1]);
    });

    std::vector<byte> dstPixels(width * height * 3);
    concurrency::graphics::copy(dstTexture, dstPixels.data(), dstPixels.size());

    SaveBitmap24("Parrots2.bmp", width, height, dstPixels.data());

    return 0;
}